
Reviewed · HIDDEN GEMS & LOCAL FAVOURITES
Discover Brussels’ most Photogenic Spots with a Local
A city that loves cameras is Brussels. This photo-focused walk helps you find better angles, avoid the worst crowds, and understand the stories behind the views. I like that it is led by an independent local guide who shares context, not just directions. I also like the small-group feel, with plenty of time to stop, frame shots, and ask questions. The only real drawback to plan for is that it is not recommended for guests with impaired mobility, and the pace is still a walking route.
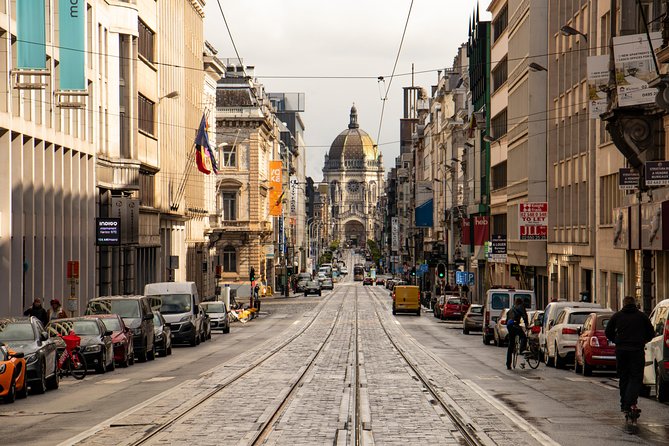
In 1 hour 30 minutes, you move through some of Brussels’ most recognizable architecture and one of its most graphic street-art moments. You will pass major sights like Palais de Justice and St. Michael and St. Gudula Cathedral, but you will spend your time chasing the shot, not stacking up with tour groups. If you want a simple checklist tour, this is not it. If you want photographs that feel intentional, you will enjoy this one.
In This Review
- Key things that make this Brussels photo tour worth it
- A photo walk that helps you see Brussels in layers
- Getting value from 1 hour 30 minutes (and why speed can be a feature)
- Where the route really shines: crowd-free photo thinking
- Stop by Palais de Justice for big scale and sharp lines
- Marollen social housing blocks, photographed from a smarter angle
- Place du Petit Sablon, the green pause with 48 statues
- Musical Instruments Museum (MIM) for the Art Nouveau turret look
- St. Michael and St. Gudula Cathedral for Brabant Gothic drama
- Royal Gallery of Saint Hubert for light, lines, and elegance
- The Comic Strip Wall for visual storytelling in panels
- Photo and content tips you can use right away
- Where to eat, drink, and visit after your photo stops
- Price and logistics: how $104.98 fits the value
- FAQ
- FAQ
- How long is the Brussels photogenic spots tour?
- What group size should I expect?
- Where does the tour start and where does it end?
- Is entry to museums or monuments included?
- What is included in the tour price?
- Is there free cancellation?
- Should you book this photogenic Brussels photo walk?
Key things that make this Brussels photo tour worth it
- Small group size for real attention: capped at 8 travelers, with the experience described as up to 6 participants, so you are not fighting for space.
- Crowd-avoiding angles: the route is built around alternative viewpoints, not the usual postcard spots.
- Pro-style photo advice on the go: you get practical tips to improve framing and composition while you walk.
- A stop list that mixes architecture and story: from Brabant Gothic to a comic strip mural that reads like a visual journal.
- Local recommendations beyond photos: you get suggestions for what to eat, drink, and visit during your stay.
More Local Favourites in Brussels
- Brussels: City Highlights and Hidden Gems Bike Tour
★ 4.8 · 443 reviews - Brussels Highlights & Hidden Gems Private Tour with a Local Guide
★ 5.0 · 251 reviews - Brussels Highlights & Hidden Gems Bike Tour
★ 5.0 · 195 reviews - Brussels PRIVATE TOUR With Locals: Highlights & Hidden Gems
★ 5.0 · 177 reviews - Brussels Like a Local: Private & Personalized Experience 2-4 hrs
★ 5.0 · 111 reviews
A photo walk that helps you see Brussels in layers
Brussels has a way of confusing first-time visitors. One minute you are staring at grand buildings that look like they belong in a movie, and the next minute you are in social-housing blocks that feel oddly overlooked. This tour makes that shift make sense by pairing each place with what you are actually looking at and why it exists.
What I like is the balance between beauty and explanation. You are not just collecting landmarks. You are learning how to read a streetscape. That makes your photos better, because you stop shooting random angles and start choosing angles that support a story.
Another plus: the guide adapts. The walking pace and itinerary can change based on weather conditions and what you care about. That matters in Brussels because light can flip fast with cloud cover, rain, and wind.
Getting value from 1 hour 30 minutes (and why speed can be a feature)
A 90-minute tour is quick, but for photography it is often the right length. You get a concentrated route with enough time at each pass-by stop to reposition, wait for better light, and reset your camera settings. You do not burn half a day, then feel stuck because you are too tired to shoot.
The practical side is also built in. The tour uses a mobile ticket, and your stops are mostly around exterior views. That means you spend your energy photographing and listening, not spending time in lines you can avoid.
The key consideration for your expectations: entry tickets are not included. So if your dream plan includes going inside museums or monuments, you will pay separately. Still, even with that, you can leave with stronger photos and a clearer idea of what to prioritize next.
Where the route really shines: crowd-free photo thinking
The main promise here is simple: avoid the usual crowd look, then find locations where Brussels photographs better. The tour is designed around alternative angles, which is why it feels different from a standard sightseeing loop.
You will hear stories as you go, and that changes how you frame things. For example, when you understand why a neighborhood looks the way it does, you stop treating it like a background and start treating it like a subject. That is also why this walk is great for content creators who need images that look intentional, not accidental.
And yes, you get recommendations too. That is not just a nice extra. It helps you turn your time in Brussels into something more than a few photos on the camera roll.
Stop by Palais de Justice for big scale and sharp lines
Palais de Justice is the kind of building that forces you to lift your camera. It is huge, and it is done in an eclectic neoclassical style, which means you get a mix of formal structure and decorative drama.
Why this stop works for photos: you can chase strong geometry. Look for how the facade lines up with the street perspective, then shift your position to change the balance between height and width. If you shoot from too close, you lose the scale. If you shoot from too far, you lose the details. The guide helps you land in that middle zone.
Practical tip: at a pass-by stop, you often have a short window to frame. Use that time to take a few bracket shots at different focal lengths, wide for context and narrower for ornament.
Still got an afternoon? Try these:

Marollen social housing blocks, photographed from a smarter angle
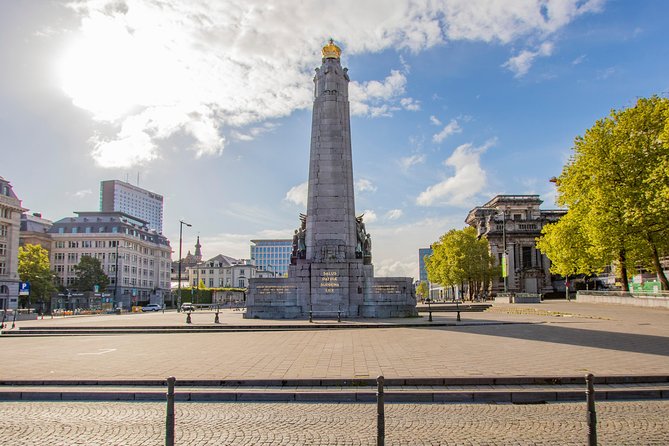
Marollen is one of those places where people either walk through quickly or miss the photo opportunity entirely. Here, you will capture towering, orange-tinted social housing blocks from an unusual angle, which is exactly the kind of shot most people never think to try.
Why this part matters: it makes your Brussels photos feel real. You are not only photographing postcard views. You are photographing the city as it lives, including housing architecture that would otherwise blend into the background.
Also, color is a weapon here. Orange-tinted facades can look flat in bad light, then glow in the right moment. So give yourself permission to move a few steps and test your angle. The guide’s job is to point you toward positions you might not find on your own.
Place du Petit Sablon, the green pause with 48 statues
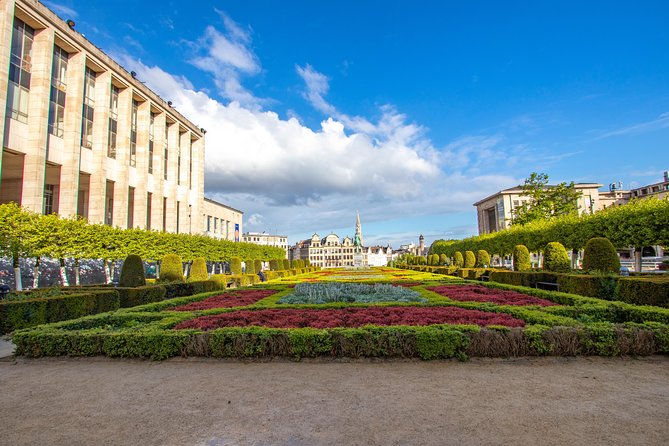
Place du Petit Sablon is a serene green space that still feels tied to the city’s elegance. The standout detail is that the area is associated with 48 statues, which gives you lots of potential compositions.
Photography-wise, this is where you can slow down a bit. You can shoot symmetrical framing if the paths and statue placements line up from where you stand. Or you can shoot detail shots, where the statue becomes a focal point and the greenery softens the edges.
A small consideration: because it is a public space, you may see other people. The tour approach helps you work around crowds by guiding you to more effective positions, but you should still expect occasional foot traffic.
Musical Instruments Museum (MIM) for the Art Nouveau turret look
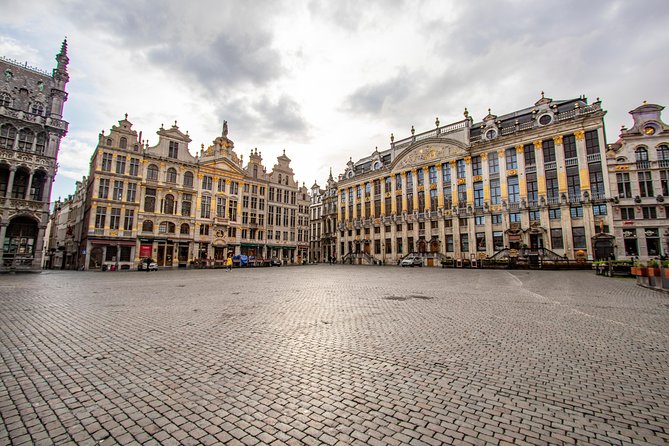
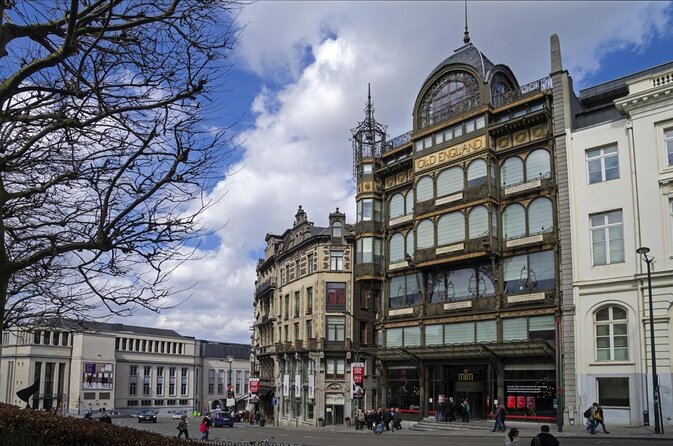
Next up is the Musical Instruments Museum, often shortened to MIM. Even if you only photograph the outside, the Art Nouveau style shows up hard. The cast-iron turret of the facade is a shot not to be missed.
Why this stop is so photogenic: turrets and ironwork love crisp light. You get texture, vertical lines, and a sense of motion in the details. That is perfect if your goal is to capture “architecture that looks like art,” not just buildings that look old.
If your phone or camera struggles with contrast, this is where your guide’s photo tips can help most. Try a lower angle to emphasize the height, then step sideways to reduce glare and improve the silhouette of the turret against the sky.
St. Michael and St. Gudula Cathedral for Brabant Gothic drama
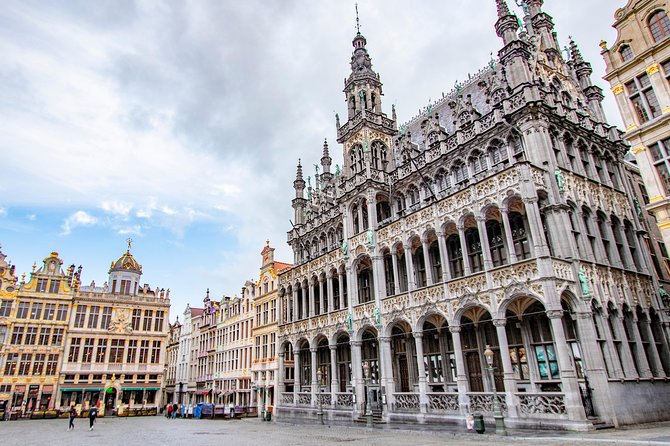
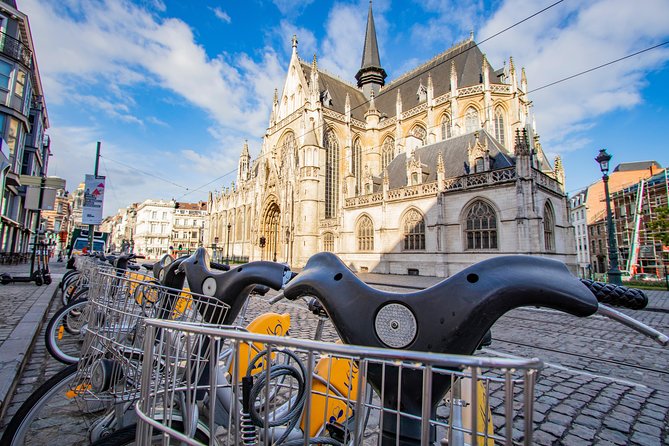
St. Michael and St. Gudula Cathedral is Belgium’s national church, built in Brabant Gothic style. It also connects to royal moments, since it has been used for royal weddings and funerals.
For photography, this is a powerhouse stop. Gothic architecture is basically built for strong, upward-looking compositions: pointed shapes, tall windows, and a facade that rewards careful framing. If you want dramatic images, this is where you get them.
The pass-by format still works because you can choose your viewing line. If you shoot too straight-on, the facade can look flat. Move slightly left or right to let side elements add depth.
Story tip you will likely appreciate: when you understand that the cathedral ties into royal ceremonies, it stops being just “a big church” and becomes a symbol of national identity. That context helps your photos feel purposeful.
Royal Gallery of Saint Hubert for light, lines, and elegance
The Royal Gallery of Saint Hubert is a world-famous shopping arcade. Yes, it is “a place to shop,” but for photographers it is also a place to hunt for light and lines.
The arcade shape gives you natural leading lines, and the enclosed feeling often changes the lighting compared to the street. That means you can come away with images that look less like outdoor snapshots and more like composed visuals.
A practical way to work it: stand where you can see the length of the gallery, then take one wider shot for context and a second tighter shot that focuses on the ceiling and edges. This is also a good place to adjust your stance so you avoid ugly reflections, depending on how reflective surfaces look at that moment.
The Comic Strip Wall for visual storytelling in panels
Brussels has comic culture, and the Comic Strip Wall turns that idea into something you can photograph and read. This stop is about embracing the visually compelling stories in the wall, so you are not just photographing art objects. You are capturing narrative.
Why it works for content creators: murals like this are made for framing. If you can capture a panel-to-panel sequence, your image instantly looks like a story, not a random wall shot.
Try this approach: first, shoot wide enough to capture multiple panels. Then zoom in for one panel where the character expressions or lines are strongest. That gives you both your main post image and supporting content.
Also, because it is a wall with details, check your shutter speed if it is windy or if people keep walking through your frame. You will get cleaner edges and fewer blurred faces.
Photo and content tips you can use right away
This tour is built for people who want better images fast, and the guide’s approach is practical. You are not sitting in a classroom. You are shooting and adjusting while you learn.
Here are the types of improvements you should expect to get, based on how the tour is designed:
- Angle planning: instead of photographing from the obvious spot, you test positions that change scale, depth, and background.
- Composition coaching: you get guidance on how to frame buildings and art so your photos look intentional.
- Quick refinements: you take a shot, adjust your position, then take another, instead of endlessly tweaking.
- Content thinking: you do not only photograph landmarks. You photograph details and storytelling elements.
Bring what helps you work. If you use a phone, keep your camera lens clean and consider using a steadier stance at busy stops. If you bring a camera, think about having a wide setting for architecture and a medium setting for details.
And one underrated tip: wear comfortable shoes. You are walking a route with multiple pass-by stops, so you want your legs to stay fresh enough to keep repositioning.
Where to eat, drink, and visit after your photo stops
One reason I like tours like this is that photos are only half the trip. The other half is what you do with the energy you just built.
You get personalized recommendations for where to eat, drink, and visit. While the exact picks depend on your guide and your interests, this style of advice is useful because it is tailored. It also helps you avoid the trap of going back to the same tourist areas you just left.
After the tour, you will also have a better mental map of where different “moods” of Brussels are. That makes planning your next walk or dinner much easier.
Price and logistics: how $104.98 fits the value
At $104.98 per person for about 1 hour 30 minutes, you are paying for three things: a local guide, a small group experience, and targeted photo coaching. Since entry tickets are not included, the cost comparison is really about expertise and access to better vantage points, not museum admission.
Compared to going solo, you save time figuring out where to stand and what to shoot. Compared to a generic sightseeing tour, you get a more camera-minded approach plus personalized recommendations. In a city like Brussels, where architecture and street art can look totally different depending on angle and light, that coaching can be worth it.
My advice on budgeting: set aside extra money only if you plan to enter museums or monuments. The tour itself focuses on exterior viewing pass by stops, so you can still enjoy the full value even without extra entries.
FAQ
FAQ
How long is the Brussels photogenic spots tour?
It is about 1 hour 30 minutes.
What group size should I expect?
It is a small-group experience with up to 8 travelers.
Where does the tour start and where does it end?
It starts at Rue Blaes 170, 1000 Bruxelles, Belgium and ends at Galerie du Roi 5, 1000 Brussel, Belgium (Royal Gallery of Saint Hubert area).
Is entry to museums or monuments included?
No. Entry tickets for public transportation, museums, and monuments are not included.
What is included in the tour price?
You get a knowledgeable local guide experience, a small-group setup, and personalized recommendations.
Is there free cancellation?
Yes. You can cancel for a full refund up to 24 hours in advance.
Should you book this photogenic Brussels photo walk?
Book it if you want Brussels photos that look planned, not random. The combination of crowd-avoiding angles, a small group, and hands-on photo tips is the right mix for anyone creating content or just trying to make their photos look better.
Skip it if you need a step-free, mobility-friendly route, since it is not recommended for guests with impaired mobility. Also, if you are expecting museum entry tickets to be included, plan to pay separately for those.
If you like architecture, street art, and storytelling that explains the city beyond the facade, you will leave with stronger images and a clearer sense of what you just saw.
Latest from Brussels
Hidden Gems & Local Favourites, compared.
Guided Retro Bike Tour of Highlights and Hidden Gems
Read our review →
Bruges, Guided Retro Biketour: Highlights and Hidden Gems
Read our review →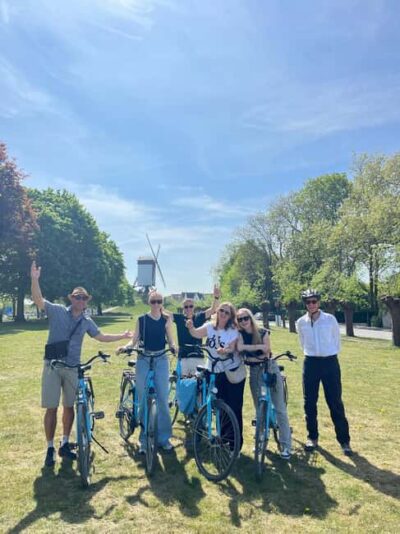
Guided Bike Tour with a Local to Sights & Secrets
Read our review →
Brussels Highlights & Hidden Gems Private Tour with a Local Guide
Read our review →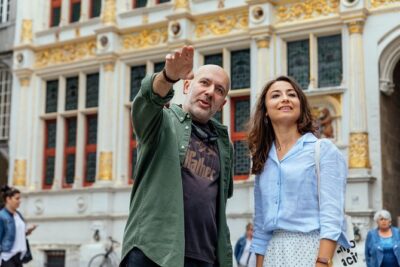
Highlights & Hidden Gems With Locals: Best of Bruges Private Tour
Read our review →
The 10 Tastings of Bruges With Locals: Private Food Tour
Read our review →
City Highlights and Hidden Gems Guided Bike Tour
Read our review →Browse the lists this tour appears in